
This is a continuation of Make Butter, Part 1.


After making several batches of butter I ran out of
little bowls to put the butter in and needed a new method. This is
what I came up with. It worked beautifully. The next time I do this
I will skip the bowls and go right to making cubes. See what you think.

I made the butter into something that looked much like
a cake. To do this I spread the butter into a cookie sheet as I finished
each batch and piled it up on itself.

As it got higher I used my hands,
a spoon and a spatula to mold the butter into what really did look
like a big cake at that point. This took awhile and I was able to
fit many batches of butter on the cookie sheet.

When it was all molded as I desired I cut it into cubes.
Fortunately, it was cold outside so I let it sit in the van overnight
so it would freeze without being bothered. The obvious alternative
to this is to stick it in the freezer.

The next morning I was able to pop each cube out of
the cookie sheet easily. I wrapped each cube in freezer paper (wax
paper would also work) and stored them in a freezer bag so they won't
come upwrapped. This will also help them to be protected in the freezer
and last for a long time.
One more thing.

Buttermilk!
It is not the same as cultured buttermilk, but is sweet
when you first strain it off the butter. We did several things with
the buttermilk. First we tried making hot chocolate with it. It was
delicious. However, it soured quickly, since the whipping cream was
close to date (which is why it was so inexpensive in the first place).
The other thing we have been using the buttermilk for is pancakes.
The were awesome and it doesn't really matter whether the milk has
gone sour when you are making pancakes or baking with it.

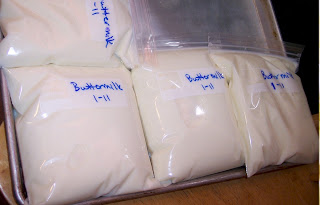
So I stored
the buttermilk in quart freezer bags and put it in the freezer. The
only caution about this is to let it freeze before you pile another
bag on top of it. Otherwise you may be surprised to find a mess in
your freezer because the bag didn't stay sealed. Happy baking!


