Wednesday, October 31, 2012

Red Riding Hood Cape

A wolf costume needs Red Riding Hood at his side. Right? This DIY project will teach you how to make your own costume.

Here's how I made the cape.

You will need 3 yards of red cotton fabric. From one end, cut 4 hood shaped pieces and two ties that are about 16 inches by 4 inches. When cutting, plan the fabric to have as much width left for the cape as possible. I used a sweater hood to decide how the hood should be shaped and how big it ought to be.

Layer the hood pieces in sets of two. Stitch around the back and top sides (the curved edge) of each set.
To make the tie, turn and press 1/4 inch on the end and along the edges. The fold in half and press.
Stitch along the edges and across the end.
Attach the ties and layer the two hoods with right sides together. Stitch along the front edge (the one that frames the face). Turn and press.
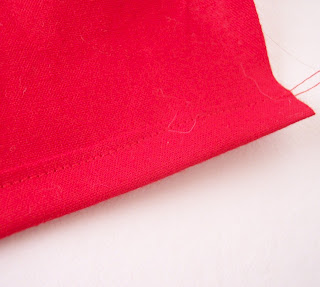
Straighten the edge of the remaining fabric and finish the cut edges by pressing under 1/4 inch and then turning 1/2 inch and stitching.
Gather one of the selvage edges to the size of the bottom open edge of the hood. Press the bottom edge of one side of the hood under. Sew the gathered edge of the cape to the unpressed edge of the hood. Topstitch along the bottom edge of the hood to sew down the pressed edge and finish.

Viola! Red Riding Hood cape. A fun costume for the right occasion.


Friday, October 19, 2012

Crock Pot Chicken Parmesan


While looking at links from the Sugar & Spice Link party I came across a recipe for Crock Pot Chicken Parmesan. I thought it the perfect idea for dinner, but with some personal changes. I have my own marinara sauce that the family adores. It's one of the recipes both of my daughters who are now away from home have asked for. But I wanted to cook it before I added it to the chicken. Here is what I came up with.

I happen to own two large crockpots. So I made the marinara sauce in one as follows. (This is a big batch!)

3 quarts tomatoes
3 small onions
3 small peppers
1 t. basil
1 t. oregano
1 t. thyme
7 bay leaves ( I know that sounds like alot, but we like it that way.)
2 T. vegetable oil
2 T. sugar
1 t. salt
1/2 t. pepper


I throw it all into the crockpot and let it cook for hours until we are ready for dinner. Sometimes I add ground beef, or meat balls. Other times I start with chicken breasts cooking in the crockpot and add these ingredients for Chicken Cacciatore. Today I will cook the chicken for awhile in a separate crockpot and then add the sauce when I'm ready.


However, I did one other thing different today. I have some grated zucchini in the fridge, so I threw a couple handfuls of that into the sauce.

I cooked the chicken as follows.

6 slices bread ends (I save the ends of the loaf and keep them in the freezer for this purpose.)

Blend until crumbs.

Add:
1/2 cup grated parmesan
1 t. salt
1/2 t. pepper
1 T. basil
1 t. oregano

Mix this together.
Mix an egg for every chicken breast in a separate bowl. I did six.


Dip each chicken in egg and then the bread crumb mix. I re-dipped in the eggs and the bread crumbs so it would give it an extra coating.
Add 1 T. vegetable oil to the crockpot and lay the chicken into the crockpot.

After about three hours, layer mozzarella cheese over the chicken breasts. Add the marinara sauce from the other crockpot.

If you don't have two crockpots, you could easily cook the marinara sauce on the stove and then add it to the crockpot.

Serve over pasta.


Monday, October 15, 2012

Got My Goat

Meet my friends, Lilly and Sweetie Pie. I borrowed these Nigerian Dwarf goats for the day to attract people into my booth.

It started out that I wanted to sell the tote bags I've been making. But it ended up being a modge podge of wares: bags, juggling balls, lotion and balms, and an effort to legalize miniature goats in Tooele.

The goats took the show. If you want to read more about the goat effort, visit Tooele Goat Justice League blog.


Wednesday, October 10, 2012

Jumprope from Grocery Bags

Need to find a great use for your grocery bags? Love to recycle in a creative way? Here's one idea. This simple jumprope has been a hit year after year with my kids and their friends. It's nice and heavy and they love that I can make it whatever legnth they want.
In this picture you can see that I've started the jumprope and finished the handle on one end. To complete this jumprope I will finish braiding the pieces of grocery bag into the rope until it is the desired length and then fold it over and duct tape around the doubled rope to create the handle.

Here's how I do the braid. I cut each grocery bag into four pieces. I like to cut it from top to bottom. I first lay it out so it is flat with a handle on each side and cut from top to bottom. Then I cut across the bottom and up the sides, snipping the handle in half at the top. I cut a bunch of these before I start braiding. The first part of the braid is always too thin and I end up cutting it off and getting rid of it. To begin, I take three pieces of cut bag and tape the handle end together. I like to attach that taped end to something, such as a chair, to keep it secure while I braid. As I braid, I quickly add more cut bags into my braid, adding them at the handle end. When I braid the new bag in, I fold the handle over into the braid and keep going.

As I explained above, once the rope is the desired length, cut it off with enough on each end to fold over for the handles. Duct tape around the handles using whatever color or design you like.

Do you have any other great ideas for making something fun with your plastic grocery bags?

Share your ideas with us.


Tuesday, October 9, 2012

Toxic Cleaners

Years ago I read and learned alot about toxic cleaners. At the time I heard some interesting stories about how they use certain bug sprays to test the affectiveness of military equipment, because the toxicity of these sprays is similar to what our soldiers could encounter in the field. This and other information caused me to question what I bring into my home.

Now let me clarify. I think we can go overboard with such information as well. But we live in a toxic world.

I've seen products come out in the past fifteen years that prove people are becoming more aware of this problem. I was creating my own non-toxic cleaners before these products were options. Such options can still provide inexpensive ways to clean a house without bringing the toxins in.

I wonder how much interest there is in these kinds of cleaners that you can make yourself. I'd love some feedback on this. If you think this is an interesting topic, and would like to see posts on this blog that include instructions for making your own non-toxic cleaners, please comment. Or if you know of other places on the web where this type of information can pe accessed, please include that link here.


Monday, October 8, 2012

Spinning English Angora

Look at this beautiful basket of wool I've collected from Alfred, my english angora. It is so soft to touch. My children can't stand to not touch it. One son told me it's like air, because it is so soft. I have to agree that it is fun to play with. Harder to work with than sheep wool though. Because it if so fine, it almost flies away. When I'm working, I have to really keep track of it. Sometimes I find random bits of wool stuck to my clothes and such.
Here's what it looks like as I spin it. I'm working on a drop spindle. Robin, at Pioneer Spinster, taught me that the spindle is a great way to begin spinning. I do have alot more control over it than when I've had the chance of sitting down to a spinning wheel. Or rather, I can go slower while I work with the fiber. It's been a great way to start spinning and now as I work with a fiber that is completely new and different it is nice to take my time with it.

If you have done any spinning, and blogged about it, I invite you to post your link here.